How to Fix a Waterlogged Garden: Drainage Solutions That Actually Work
Water pooling for days and plants wilting tells you that excess water, not drought, threatens your garden. You can fix a waterlogged garden by improving drainage, amending soil structure, and choosing resilient planting strategies that prevent recurring soggy spots.
Start by spotting where water collects and why compacted clay, poor grading, or blocked runoff are common culprits so you can pick targeted fixes like French drains, raised beds, or soil amendments. Expect practical steps for quick relief and long-term soil management that let you restore healthy roots and prevent future flooding.
Identifying Waterlogging Issues
You will learn visible signs, how water moves through your garden, and what the soil actually feels like. Use these checks to decide whether to improve surface drainage, amend soil, or install a subsurface drain.
Visual Signs of Excess Moisture
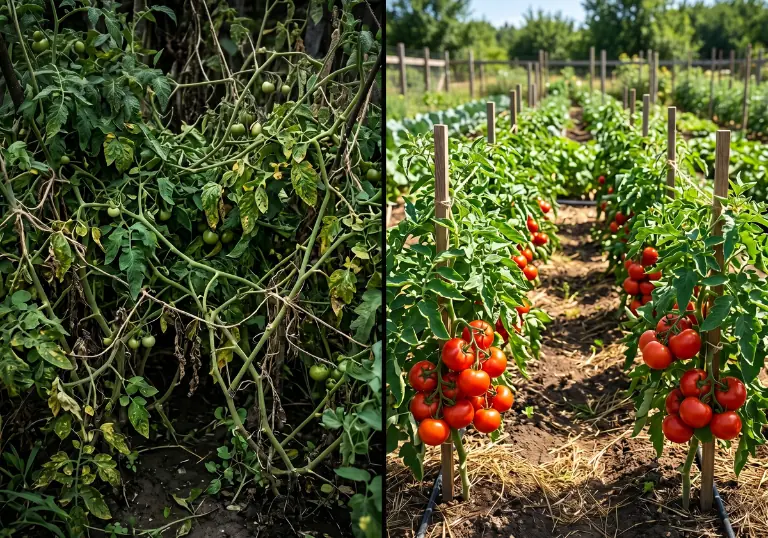
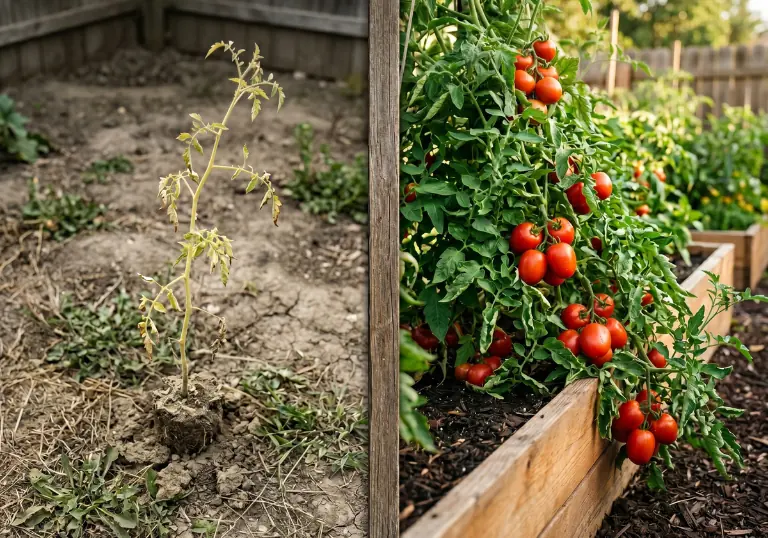
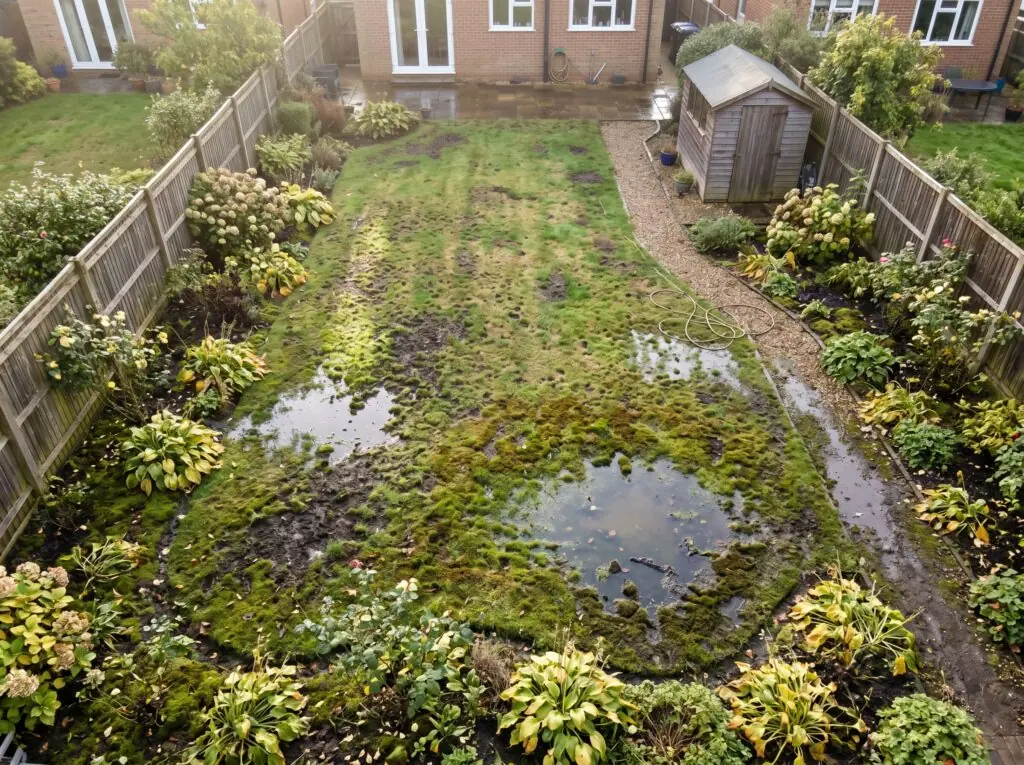
Look for standing water that remains more than 24–48 hours after rain or irrigation. Puddles in the same spots, suddenly yellowing or wilting leaves, and slow growth indicate roots under stress from low oxygen.
Check plant roots and crowns for rot—brown, mushy tissue near the soil line signals prolonged saturation. Moss or algae growth on soil and compacted, bare patches where grass won’t grow are additional clues. Note which plants decline: water-loving species may tolerate wet spots while most vegetables and perennials suffer.
Keep a simple log of where and when symptoms appear. Photograph problem areas after storms to compare changes over weeks.
Assessing Drainage Patterns
Walk the garden during and after a heavy rain to map water flow. Mark downhill channels, low spots where water pools, and hard surfaces that direct runoff toward beds. You can tilt a long board or hose to visualize slope and identify where grading will help.
Dig shallow trenches or use a trowel to expose soil cross-sections along suspected flow lines. Look for saturated layers, mottled colors, or a perched water table within 12–18 inches of the surface. These indicate poor vertical drainage.
Use a simple percolation test: dig a 12-inch deep hole, fill it with water, and time how long it takes to drain. Less than 1 inch per hour drains poorly; faster rates indicate acceptable percolation.
Evaluating Soil Texture
Squeeze a small handful of damp soil to test texture and structure. If it forms a dense, sticky ball that holds shape, you likely have heavy clay with poor drainage. Sandy soil crumbles and drains quickly and won’t hold a ball.
Observe layering: a dark, crumbly top layer over a dense, grey subsoil points to a restrictive layer. That layer prevents roots and water from moving downward. Take a soil sample from 6–12 inches deep and rub it between fingers; gritty = sand, smooth and ribboning = silt, slick and plastic = clay.
Consider simple amendments only after confirming texture. Compost and gypsum can improve structure in many soils, but deep compaction may require mechanical aeration or replacing soil in affected beds.
Effective Drainage Solutions
Address standing water by directing it away, increasing soil percolation, or raising planting areas. Each method below shows what to install, where to place it, and the typical materials and dimensions you’ll need.
Installing French Drains
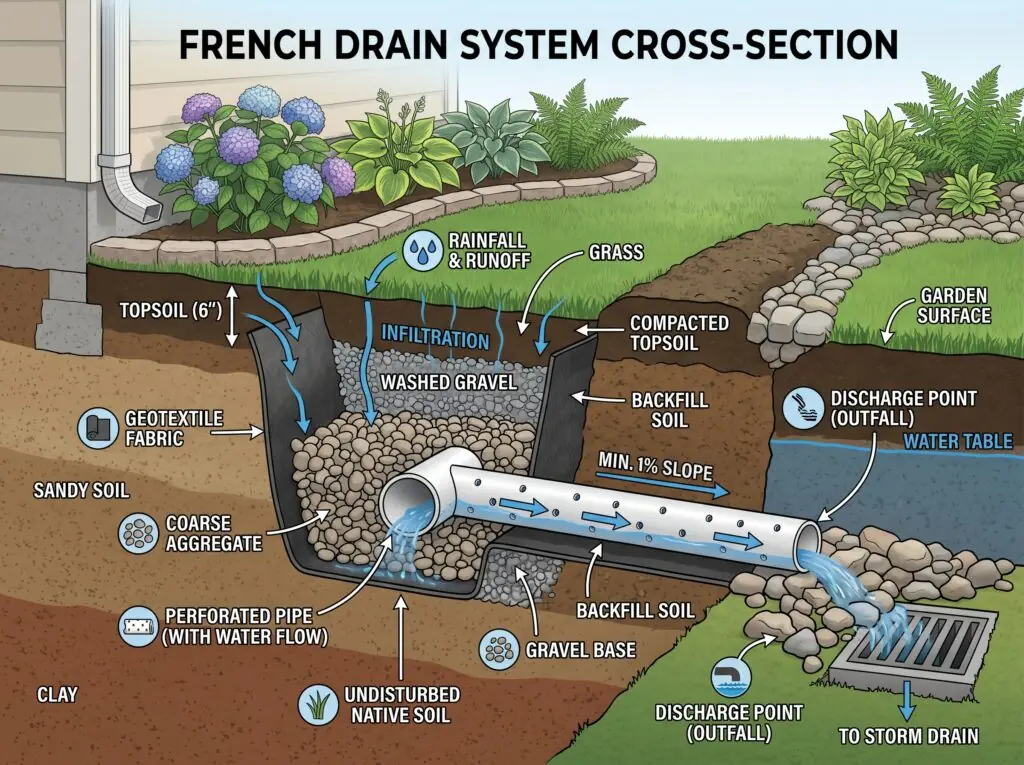
A French drain collects subsurface water and carries it to a safe outlet. Dig a trench 12–24 inches wide and 18–36 inches deep, sloping at least 1% (1 foot drop per 100 feet) toward the discharge point.
Line the trench with landscape fabric, add a 2–3 inch layer of coarse gravel, lay a perforated pipe (holes down), then cover with more gravel and folded fabric to keep soil out. Backfill with soil or top with decorative stone for access.
Use a solid pipe if the outlet runs across lawns or under driveways.
Inspect yearly: remove debris at the outlet and ensure the slope hasn’t settled. This system works best where groundwater or perched water causes saturation.
Using Raised Garden Beds
Raised beds lift roots above the water table and improve aeration. Build beds 12–24 inches tall using rot-resistant wood, composite, or concrete blocks. A minimum width of 3–4 feet keeps soil reachable without compacting it.
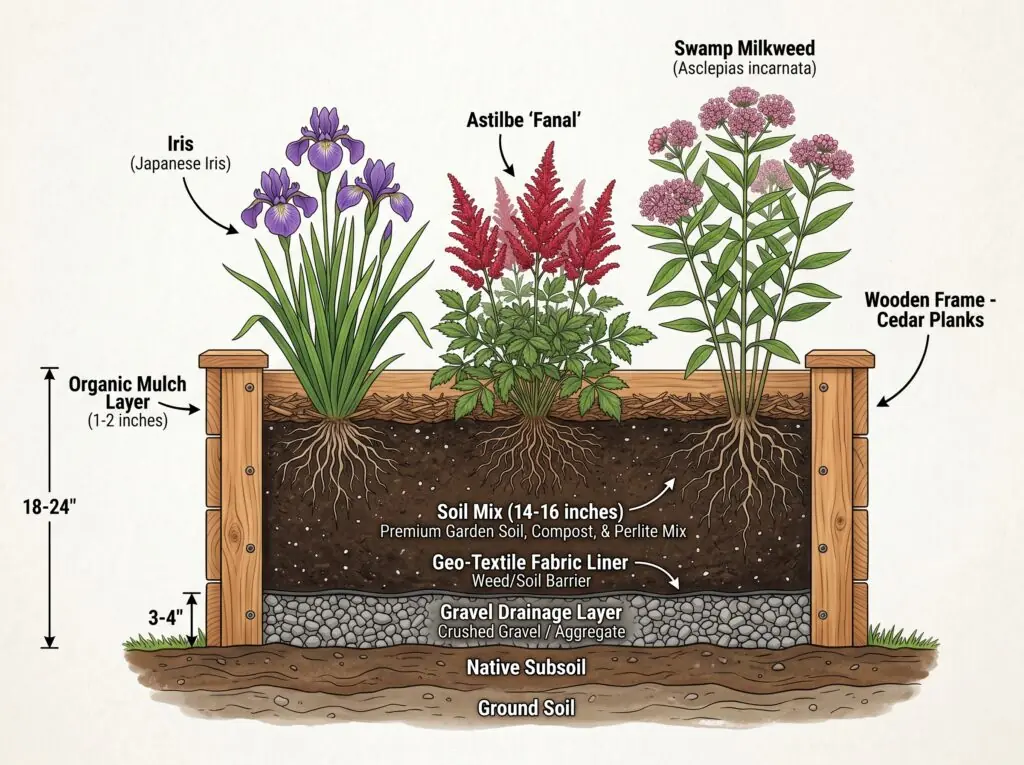
Fill beds with a layered mix: 3–4 inches coarse gravel or crushed rock for drainage, then a blend of topsoil, compost, and coarse sand. Avoid compacting soil; instead, fluff and water-test: after a heavy rain, water should drain through the bed within 24–48 hours.
For heavy clay sites, increase depth to 24–30 inches or add internal drain pipes to speed removal. Position beds on a slight slope or add a small outlet at one end to prevent pooling.
Creating Swales and Berms
Swales are shallow channels that slow and redirect surface runoff; berms are companion raised mounds that retain redirected water. Lay out swales along contour lines so they run level across the slope; typical depth is 6–12 inches and width 2–6 feet depending on runoff volume.
Line swales with sod, native grasses, or mulch to reduce erosion and help infiltration. Place berms on the downslope side using native soil; compact lightly and seed or plant with deep-rooted perennials to stabilize the mound.
Include check dams (rock or timber) spaced along long swales to slow flow and encourage infiltration. Use swales for roof runoff, driveway sheet flow, and saturated lawn areas where subsurface drainage isn’t feasible.
Long-Term Soil Management
Focus on improving drainage capacity, increasing organic matter, and matching plants to wetter spots. These steps reduce ponding, build resilient soil structure, and lower maintenance over time.
Incorporating Organic Amendments
Add 2–4 inches of well-rotted compost across affected beds each fall or spring and work it into the top 6–8 inches of soil. Compost increases pore space so water drains faster and roots get more oxygen.
Use coarse materials where clay dominates: wood chips, leaf mold, and aged manure improve aggregation. Avoid fresh manure or uncomposted kitchen scraps that can tie up nitrogen or introduce pathogens.
Apply a 2–3 inch mulch layer after amendments to slow surface crusting and reduce compaction from rain. Replenish mulch annually and top-dress with compost every 1–3 years depending on soil tests.
Choosing Water-Tolerant Plants
Map your yard by micro-elevation to find spots that stay wet more than 2–3 days after rain. Plant tolerant species there to avoid repeated losses and reduce the need for heavy drainage work.
Select specific options by region and soil: rushes (Juncus), iris (Iris pseudacorus or bearded iris in some zones), Ligularia, Astilbe, and swamp milkweed (Asclepias incarnata). Use native wetland species when possible for better establishment.
Group wet-area plants together and stagger root depths—shallow marsh species near surface pooling, deeper-rooted perennials where soil improves. Replace failed non-tolerant plants promptly to prevent bare, compacted spots.
Improving Soil Structure Over Time
Conduct a soil test every 2–4 years to track pH, organic matter, and texture changes. Amend based on results: lime for low pH, gypsum for sodic clays (if test recommends), and steady compost to raise organic matter.
Employ mechanical and biological methods: annual core aeration for lawns, double-digging or broadforking beds to loosen compacted layers, and cover crops (buckwheat, winter rye) to increase root channels and add biomass. Rotate shallow- and deep-rooted cover crops to break up dense horizons.
Monitor infiltration rates by timing how long a 1-inch rainfall takes to clear; aim to reduce standing time each season. Keep heavy equipment and foot traffic off wet soil to prevent re-compaction.