How To Plant Seed Potatoes in the Ground: Complete Growing Guide
You can plant seed potatoes in the ground with simple, repeatable steps that give you healthy, homegrown potatoes every season. Use certified seed potatoes, firm soil that drains well, and plant pieces or whole tubers with eyes facing up at about 4–6 inches deep and 12–18 inches apart to get reliable results.
This guide walks you through choosing and preparing seed potatoes, picking the best site and soil, a clear step-by-step planting process, ongoing care and hilling, plus harvest and troubleshooting tips so you avoid common problems like scab or blight. Expect practical, actionable advice so you can start planting confidently and maximize your crop without unnecessary fuss.
Contents
Choosing and Preparing Seed Potatoes
Start with certified, disease-free tubers that suit your cooking and storage needs. Prep them by chitting, cutting large tubers into pieces with eyes, and letting cut surfaces cure to reduce rot risk.
Selecting Certified Disease-Free Seed Potatoes
Buy certified seed potatoes from a reputable supplier or local extension program to reduce risk of pests and pathogens like blight and common scab. Certified stock carries documentation that it has been inspected and is free of many serious diseases that can persist in soil year-to-year.
Inspect tubers before planting. Choose firm potatoes without soft spots, green skin, or surface blemishes; avoid any with signs of scab, rot, or fungal lesions. Do not plant grocery-store potatoes because they may carry growth inhibitors or unknown diseases and some varieties may be patented.
Store seed potatoes in a cool, dark place (45–55°F, 90–95% RH) until chitting. Handle them gently to avoid bruises that invite infection. Label varieties clearly so you track culinary use—e.g., Yukon Gold for mashes, Purple Majesty for color, and fingerlings for roasting.
Understanding Potato Varieties and Uses
Match variety to purpose: waxy varieties (fingerlings, new potatoes) hold shape for salads; starchy types (Russets) are best for baking and frying; all-purpose varieties (Yukon Gold) suit most uses. Variety choice also affects harvest timing and storage life.
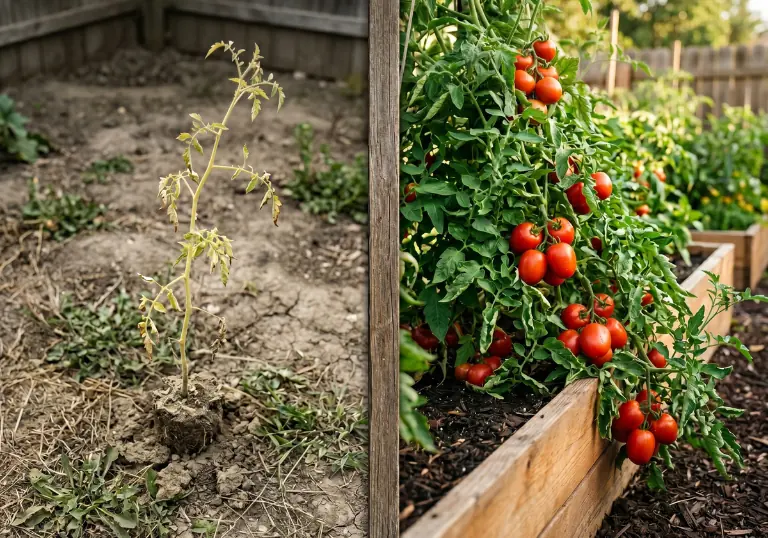
Consider disease resistance when choosing varieties. Some cultivars show tolerance to late blight or common scab; check cultivar descriptions from your supplier for resistance ratings. Rotate crops and avoid planting nightshade-family relatives in the same bed for three years to reduce soil-borne disease pressure.
Also factor in maturity and climate. Early varieties produce new potatoes in 60–90 days and suit short seasons. Maincrop varieties produce larger storage potatoes but need longer warm soil and good hilling to prevent greening and solanine buildup.
Chitting and Pre-Sprouting Techniques
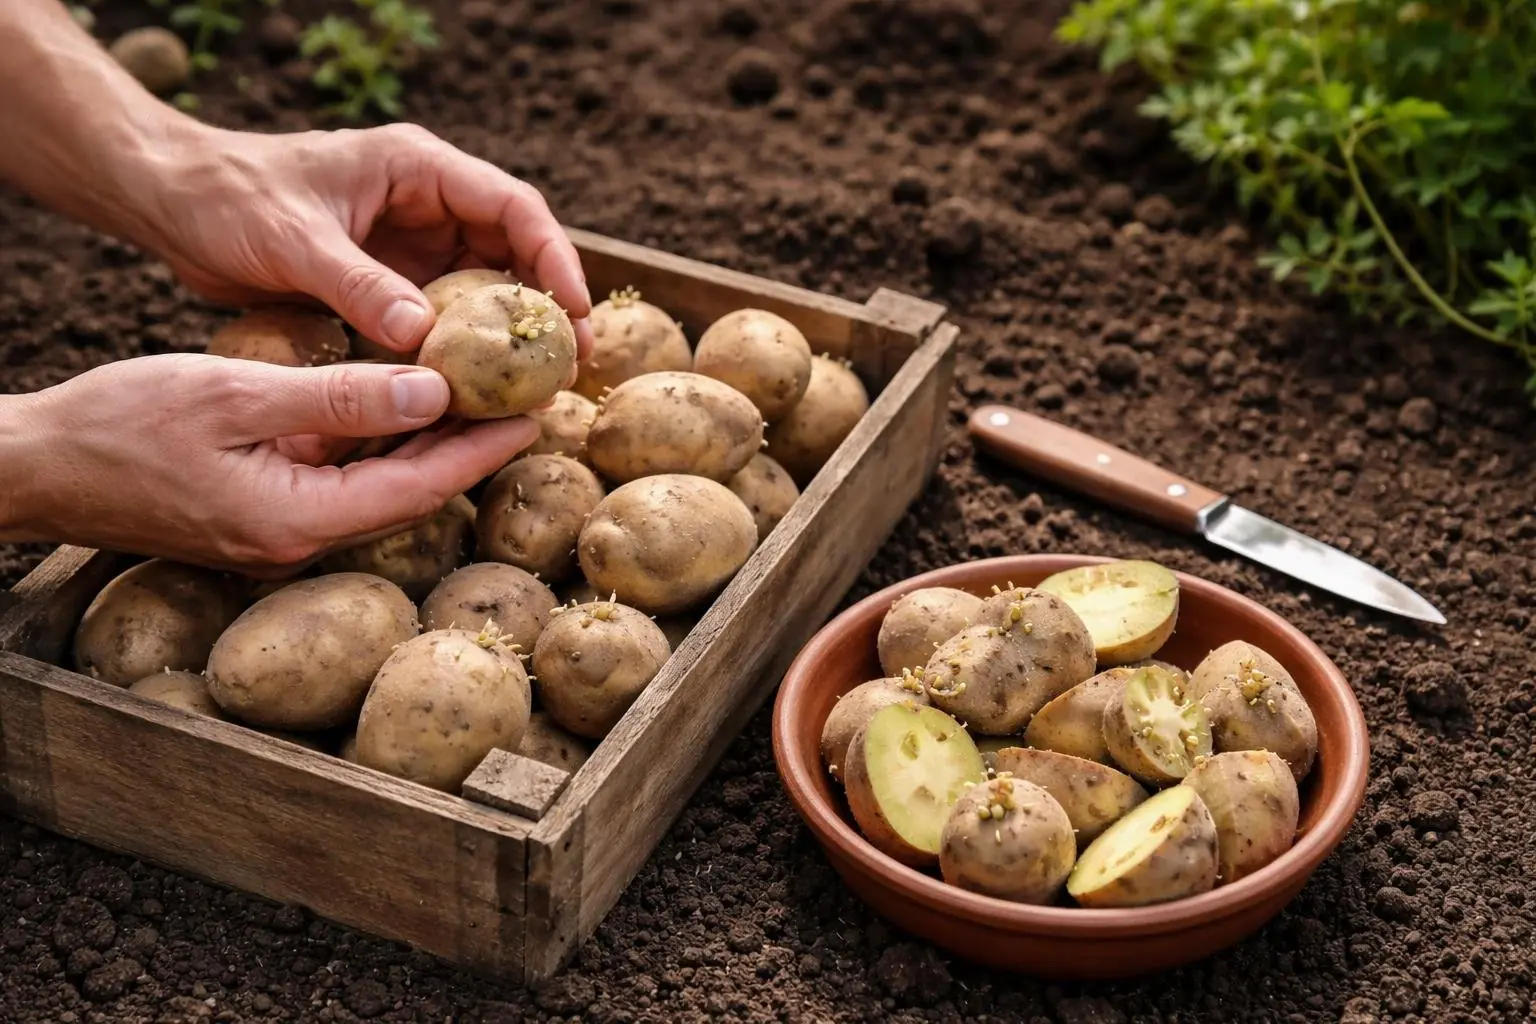
Chit seed potatoes 2–4 weeks before planting to produce short, strong sprouts. Place seed tubers in bright, cool light (not direct sun) on egg crates or trays with the eyes facing up. Aim for stout sprouts about 1/2–1 inch long rather than long, weak shoots.
Keep the chitting area around 50–60°F to prevent overly rapid, spindly growth. Check daily and remove any pieces with rot or mold; discard affected tubers to avoid spreading pathogens like blight. Light encourages robust sprouting but avoid temperatures above 70°F.
If you need to plant immediately, plant unchitted potatoes—sprouts will form in soil—but chitting gives an earlier, more uniform emergence and lowers rot losses, especially in cool, wet soils.
Cutting and Curing Seed Potatoes Safely
Cut large seed potatoes so each piece has at least two healthy eyes. Use a clean, sharp knife and disinfect between tubers with a 10% bleach solution or rubbing alcohol to limit disease transfer. Smaller seed tubers under 2 inches can remain whole.
After cutting, spread pieces in a single layer in a well-ventilated, cool place for 48–72 hours to form a dry callus over the cuts. This curing step reduces the chance of rot once planted. Avoid curing in high humidity or warmth, which encourages disease.
Discard any pieces with soft flesh, foul odor, or dark streaks that indicate internal disease. When planting, place cut side down and sprouts up, and hill soil over emerging shoots to protect tubers from light, which causes greening and raises solanine levels.
Site Selection and Soil Preparation
Choose a spot that gets steady sun and sheds excess water. Prepare well-drained, loose soil and decide whether you’ll plant directly in the ground, a raised bed, grow bag, or straw method.
Optimal Sunlight and Drainage Conditions
Plant where the soil receives at least 6–8 hours of full sun daily; more sun gives firmer skins and better yields. Avoid low, shaded hollows or beneath dense tree canopies where light and airflow are limited.
Select a location with good drainage. Potatoes dislike standing water; a sandy loam or amended clay that drains within a day after heavy rain works best. If your ground is heavy clay, raise the bed or use grow bags to prevent tuber rot.
Check slope and runoff. A gentle slope helps water move away from plants. If drainage is uneven, create raised rows or mounds 4–8 inches high to keep seed potatoes from sitting in moisture.
Soil Amendments and Raised Bed Considerations
Aim for loose, friable soil to allow tuber expansion. Work in 2–4 inches of well-rotted compost per 10 square feet to improve texture and nutrients. Mix compost into the top 8–12 inches of soil before planting.
Adjust pH to 5.8–6.5; add lime only if soil tests show acidity below that range. Avoid fresh manure at planting time because it can encourage scab and excessive foliage at the expense of tubers.
For raised beds and grow bags, use a blend of topsoil, compost, and coarse sand or perlite for drainage. Fill grow bags to allow hilling as plants grow. Straw planting can work: layer seed potatoes on prepared soil and cover with 6–8 inches of straw, adding more straw as plants emerge to protect tubers and reduce digging.
Crop Rotation to Prevent Disease
Rotate crops and avoid planting potatoes where solanaceous crops (tomatoes, eggplants, peppers) grew within the last 3 years. This reduces buildup of soil-borne pathogens like late blight and common scab.
Keep records of bed and grow-bag histories. If you must plant sooner, replace soil in grow bags or refresh the top 6–8 inches of bed soil with new compost and sterile topsoil.
Practice good sanitation: use certified disease-free seed potatoes, remove volunteer potato plants, and clean tools between beds. These steps lower disease risk and protect future harvests.
Step-by-Step Planting Process

You will prepare the row, place chitted seed potatoes or cut pieces with at least two eyes, and manage spacing, depth, and soil cover to promote tuber development and avoid green potatoes. Regular watering, light mulch, and timely hilling protect new potatoes and improve yields.
Spacing, Depth, and Trench Preparation
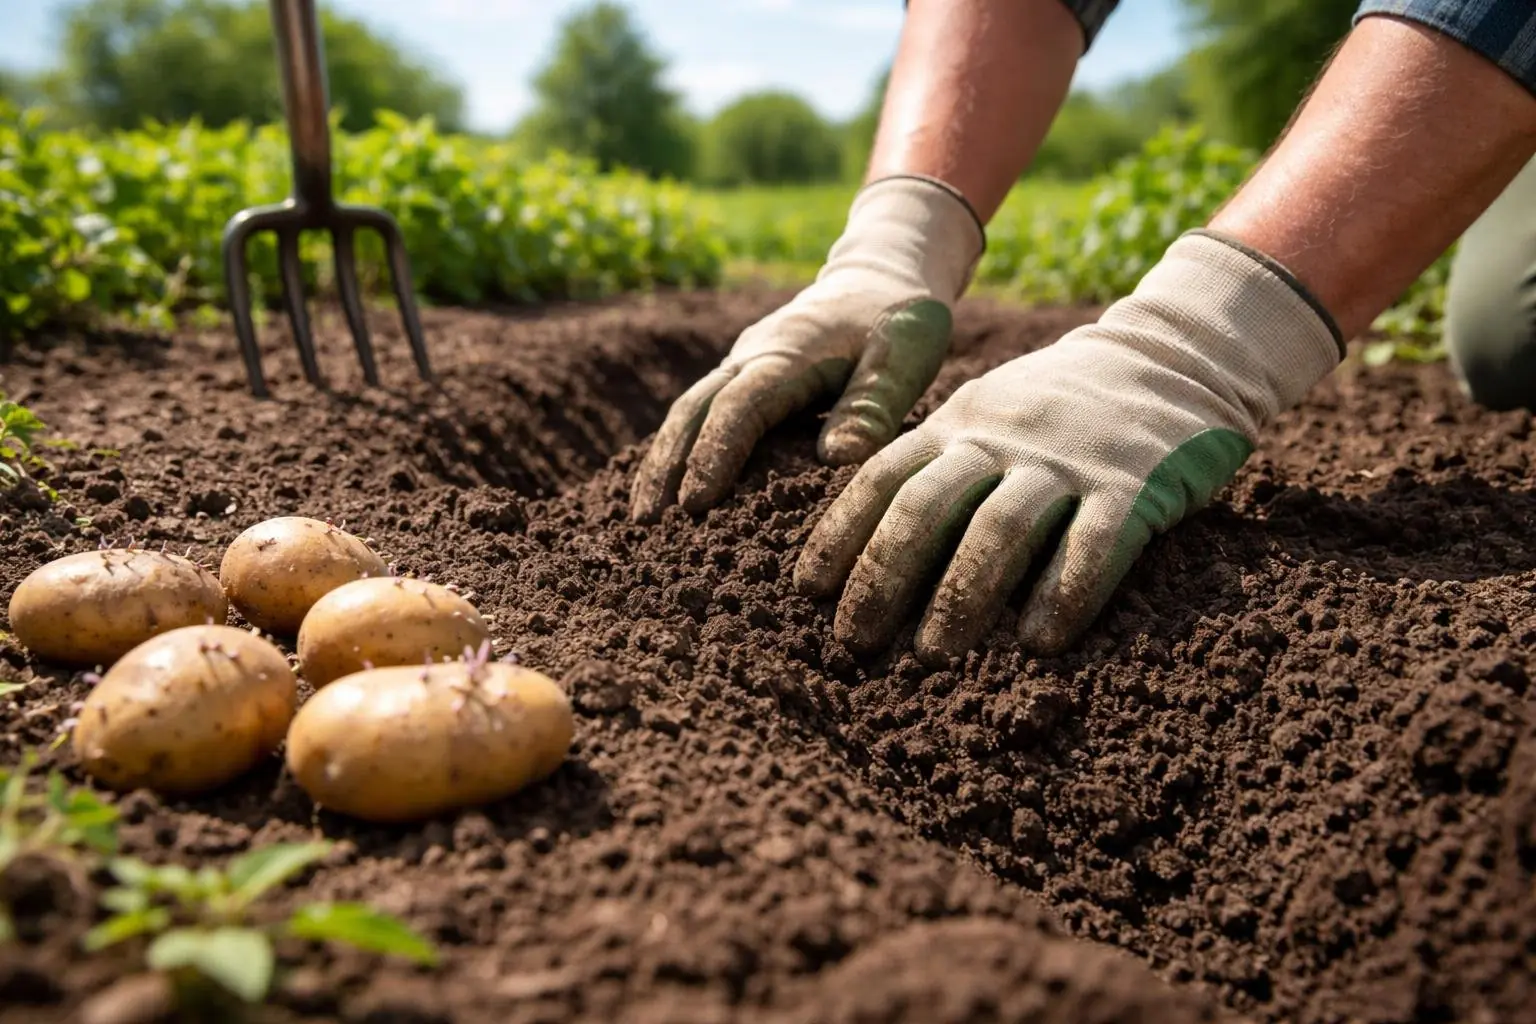
Measure rows 24 inches apart to give each plant room for tuber growth and for you to hill easily. Space individual seed pieces 12–15 inches apart in the row; use 10–12 inches for compact or fingerling varieties.
Dig a trench 4 inches deep in heavy clay and 6 inches deep in light, sandy soil. Remove large stones and break clods so tubers form in loose soil rather than compacted pockets. Work 2 inches of compost into the topsoil along the trench to improve fertility and drainage.
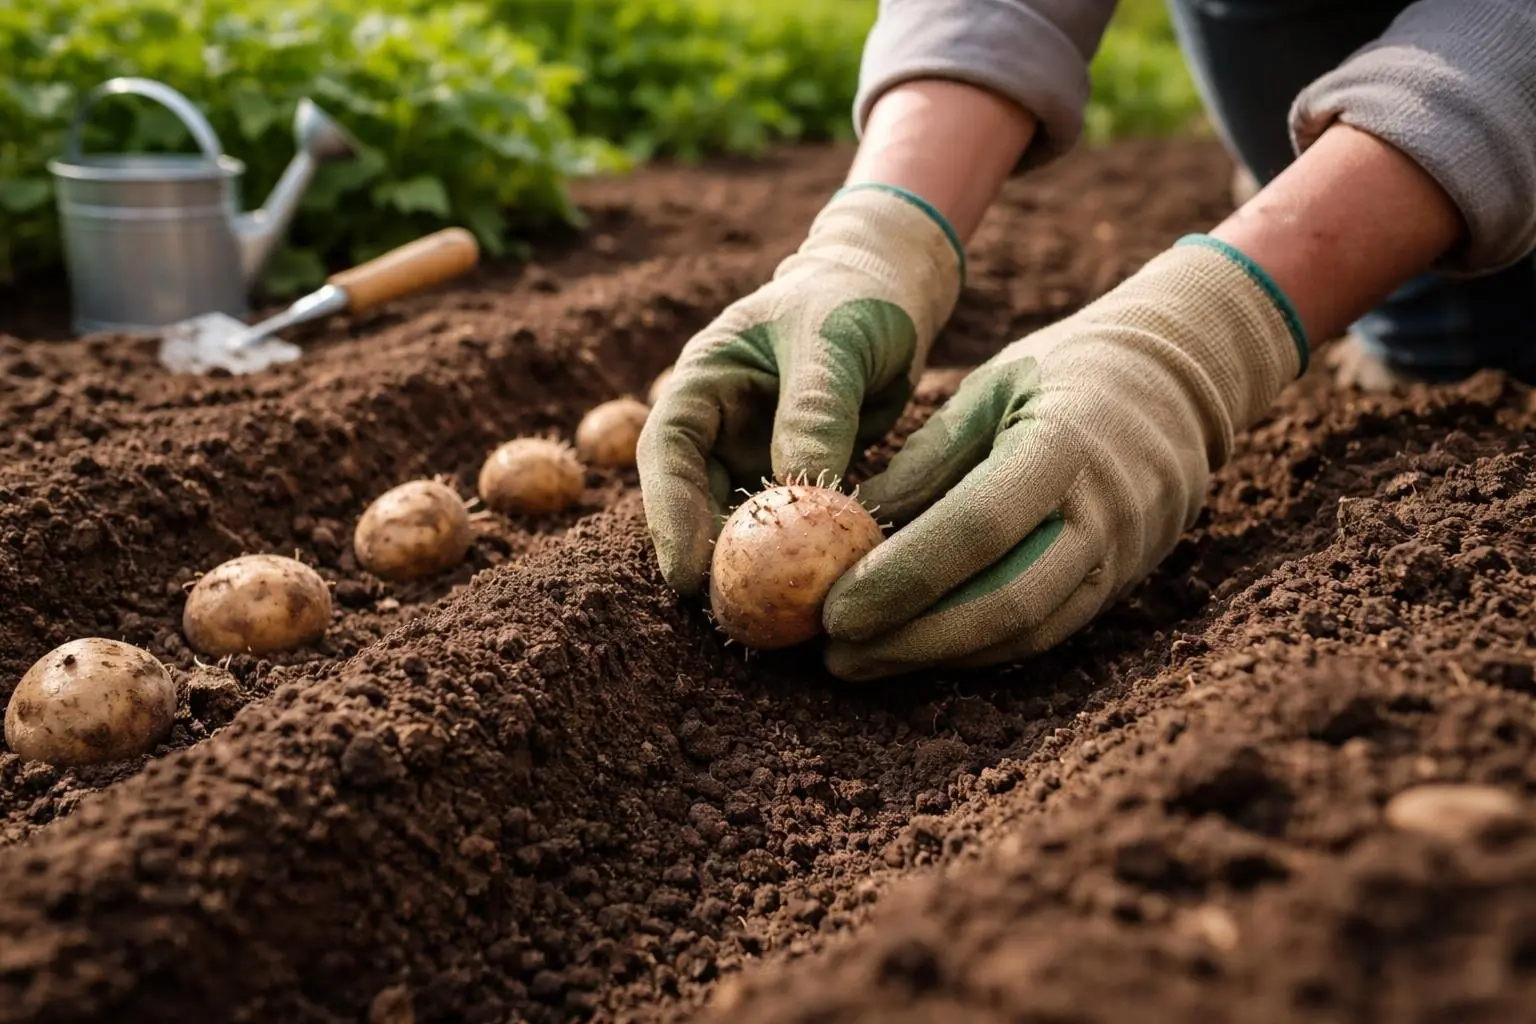
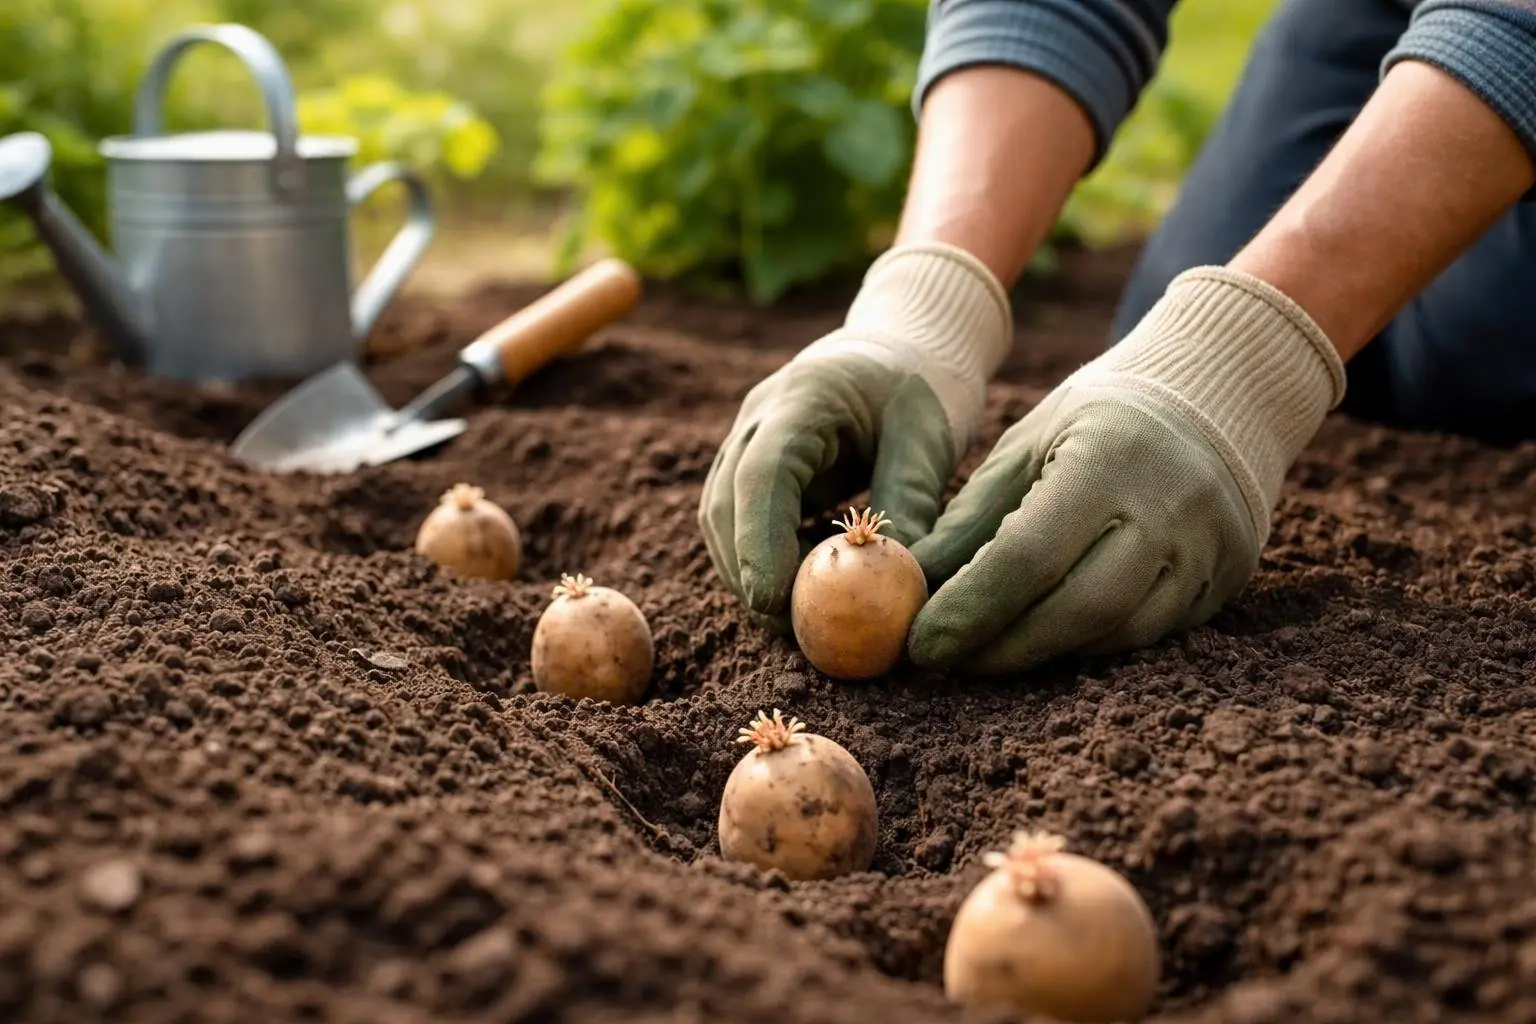
Mark planting positions with a trowel or string to keep consistent spacing. If planting whole small seed potatoes, place them without cutting; cut large tubers into pieces each with two eyes and let callus for 48–72 hours before planting.
Planting Seed Potatoes Correctly
Place each piece cut-side down with sprouts or eyes facing upward to encourage upright shoots. Set seed pieces so the top of the seed sits about 2–4 inches below the finished soil surface; cover accordingly based on your trench depth.
If using trenches, lay seed pieces in the bottom and backfill with 2–4 inches of soil; you will hill later as shoots grow. For individual holes, plant at the same depth and cover lightly. Avoid planting when soil is too wet — compacted, waterlogged soil increases rot risk and will reduce the numbers of mature potatoes.
Tag rows with variety names and planting dates to monitor new potatoes versus main crop timing. Leave 24–36 inches between rows if you plan to machine-hill or use wide hoes.
Watering and Mulching Strategies
Water immediately after planting to settle soil around seed pieces and start tuber development. Maintain even moisture: supply about 1 inch of water per week during active growth, increasing slightly during tuber bulking.
Apply a 2–3 inch layer of straw or coarse mulch after shoots reach 2–4 inches to conserve moisture and suppress weeds. Mulch helps keep developing tubers shaded so they don’t turn green and inedible.
Hill soil up around plants when shoots reach 6–8 inches tall, adding another 2–4 inches of soil or mulch. Repeat hilling once more in 2–3 weeks to create loose, deep soil for more tuber formation and to protect both new potatoes and maturing tubers from sun exposure.
Care, Harvesting, and Troubleshooting

Maintain even soil moisture, hill soil or straw to keep tubers dark, scout for pests and disease, and harvest when skin firms. Cure and store only healthy tubers in a cool, dark, humid spot to preserve quality.
Hilling and Supporting Plant Growth
Hill successive layers of loose soil or straw around stems when shoots reach about 6–8 inches tall. Draw soil up so only the top leaves remain exposed; repeat whenever stems reach that height again. Hilling prevents tubers from greening and increases the number of shallow tubers.
If you plant in straw or containers, add more straw or potting mix as the foliage grows to keep tubers covered. Space rows 12–18 inches apart and hill to about 4–6 inches above the seed potato for early types, a bit more for main-crop varieties. Avoid compacted soil; loose, friable soil produces smoother, well-shaped tubers.
Water deeply and consistently—about 1–2 inches per week—especially from flowering through tuber bulking. Reduce watering as foliage yellows to help skin set for storage. Mulch with organic material to retain moisture and suppress weeds.
Pest and Disease Management
Scout weekly for Colorado potato beetle, aphids, and signs of disease like blight or scab. Handpick beetles and larvae into soapy water early in the morning. Use row covers until plants flower to reduce beetle and flea beetle pressure; remove covers at bloom for pollination if growing seed potatoes or flowers.
Manage aphids with strong water sprays, insecticidal soap, or beneficials like ladybugs. For late blight, remove and destroy infected foliage immediately; avoid overhead watering and ensure good airflow. Prevent scab by planting scab-resistant varieties and keeping soil pH slightly acidic (5.8–6.5) and evenly moist during tuber formation.
Practice crop rotation—avoid planting potatoes where solanaceous crops grew the previous 2–3 years. Use certified seed potatoes to reduce viral and fungal introductions. Fungicide or organic copper sprays can help in high-risk blight seasons, applied per label and local advisories.
When and How to Harvest
Harvest early potatoes (new potatoes) when plants flower and tubers reach desired size; use a fork to lift gently. For mature main-crop potatoes, wait until foliage has died back or turned brown. Stop watering a week or two before digging to firm skins.
Work from the outside toward the plant to avoid spearing tubers. Lift soil carefully with a fork; avoid cutting or bruising tubers. If you find small potatoes, leave them to grow unless you need to thin for size. On wet soil, let tubers dry briefly on the surface in shade to toughen skins, but don’t leave them long enough to green.
Check tuber skins: mature potatoes have skins that resist rubbing off. If skins rub off easily, leave the hill for several more days. Remove any tubers with soft spots, cuts, or disease.
Storage and Preservation Tips
Cure potatoes for 1–2 weeks in a dark, humid, cool place at about 45–60°F (7–15°C) to thicken skins. Keep them out of direct light to prevent greening and solanine formation. Do not wash before storage; brush off excess soil instead.
Store long-term at 38–40°F (3–4°C) with 85–95% relative humidity if possible; a perforated dark bag or ventilated crate works. Keep potatoes away from apples and other ethylene-producing fruit to avoid sprouting. Inspect stored potatoes every 2–3 weeks and remove any that show rot or sprouting to protect the rest.
For short-term use, room temperature storage in a dark cabinet is fine for a few weeks. Preserve excess harvest by freezing cooked potatoes, fermenting into potato salad conserves, or drying/slicing for long-term use.
Frequently Asked Questions
You will find clear, actionable answers about planting depth and spacing, soil type and feeding, and the timing and method for hilling. Each answer gives specific measurements and steps you can apply directly in the garden.
How deep should I plant seed potatoes, and how far apart should they be spaced?
Plant seed potatoes 4 inches deep in heavy soils and about 6 inches deep in light, sandy soils. Place seed pieces or whole small tubers 12 to 15 inches apart within rows, and leave about 24 inches between rows to give you room to hill and to allow air circulation.
Cover seed potatoes with 2 to 4 inches of soil after planting; keep soil consistently moist until sprouts emerge. If you plant in trenches, you can add more soil later as you hill.
What soil conditions and fertilizer work best for growing a strong potato crop?
Choose a sunny spot with well-drained loam or sandy loam that warms to about 60–70°F. Work in 2 inches of mature compost or well-rotted organic matter before planting to improve structure and fertility.
Avoid fresh manure or excessive nitrogen fertilizers, which encourage leafy growth at the expense of tubers. Use a balanced fertilizer (for example, 5-10-10) at planting if your soil test shows low phosphorus or potassium; side-dress with a low-nitrogen feed only if plants show pale leaves or slow growth.
How and when should I hill soil around potato plants as they grow?
Begin hilling when shoots reach 6 to 8 inches tall. Mound several inches of loose soil around stems so the developing tubers stay covered and shaded; this prevents greening and reduces sunscald.
Repeat hilling once or twice at 2–3 week intervals, until you have created a mound 6–8 inches high. In containers, add fresh potting mix around stems instead of digging soil from between rows.